

By Montessori Toys · Updated July 2026 · 17 min read
Fine Motor and Handwriting Toolkit: Essential Tools and How to Use Them at Home and in the Classroom
In this guide:
Why a Toolkit Helps More Than Random Tools
Parents and teachers are often encouraged to “use pencil grips” or “try special paper,” but it is easy to feel overwhelmed by options or end up with a drawer full of unused items. A simple, intentional toolkit makes it easier to choose the right tool for the right child and task, and to use it consistently instead of trying something once and forgetting about it.
Occupational therapists often talk about “kits” because grouping tools together around clear goals—like hand strength, pencil control, or spacing—helps everyone understand why each item is there and how it connects to the child’s fine-motor, sensory, and handwriting needs. The aim is not to collect gadgets but to have a small set of tools you actually use.
Core Tools and What They Are For
Most fine-motor and handwriting toolkits include a mix of items that support hand strength, posture, pencil control, spacing, and sensory regulation. Many of these can be everyday materials you already have, plus a few specialised items like grips or adapted paper.
Below is a brief description of common categories you can include in your toolkit. The table in the next section pulls these into a “tool → purpose → how to use” format so parents and teachers can match tools to needs quickly.
- Pencils and grips: Child-sized pencils and simple grips can make it easier to hold the pencil in a functional way without squeezing too hard or using awkward finger positions.
- Adapted paper: Paper with bold lines, coloured margins, or raised/embossed lines provides extra visual or tactile guidance for letter size and placement.
- Putty, playdough, and hand-strength tools: These build the small muscles needed for grip and control, and can be used in short warm-ups before writing.
- Scissors and craft materials: Cutting, tearing, and gluing tasks support bilateral coordination and hand-eye coordination in a fun, creative way.
- Peg boards and small manipulatives: Peg boards, beads, and similar items support precision pinch, patterning, and visual-motor skills that carry over into writing.
- Slant boards and desk supports: A slight writing angle and stable seating (feet flat, hips and knees at about 90 degrees) support posture and visual access to the page.
- Sensory supports: Simple items like a fidget, a chair band, or a small lap weight can help some children regulate their body and focus better during writing tasks when used thoughtfully.
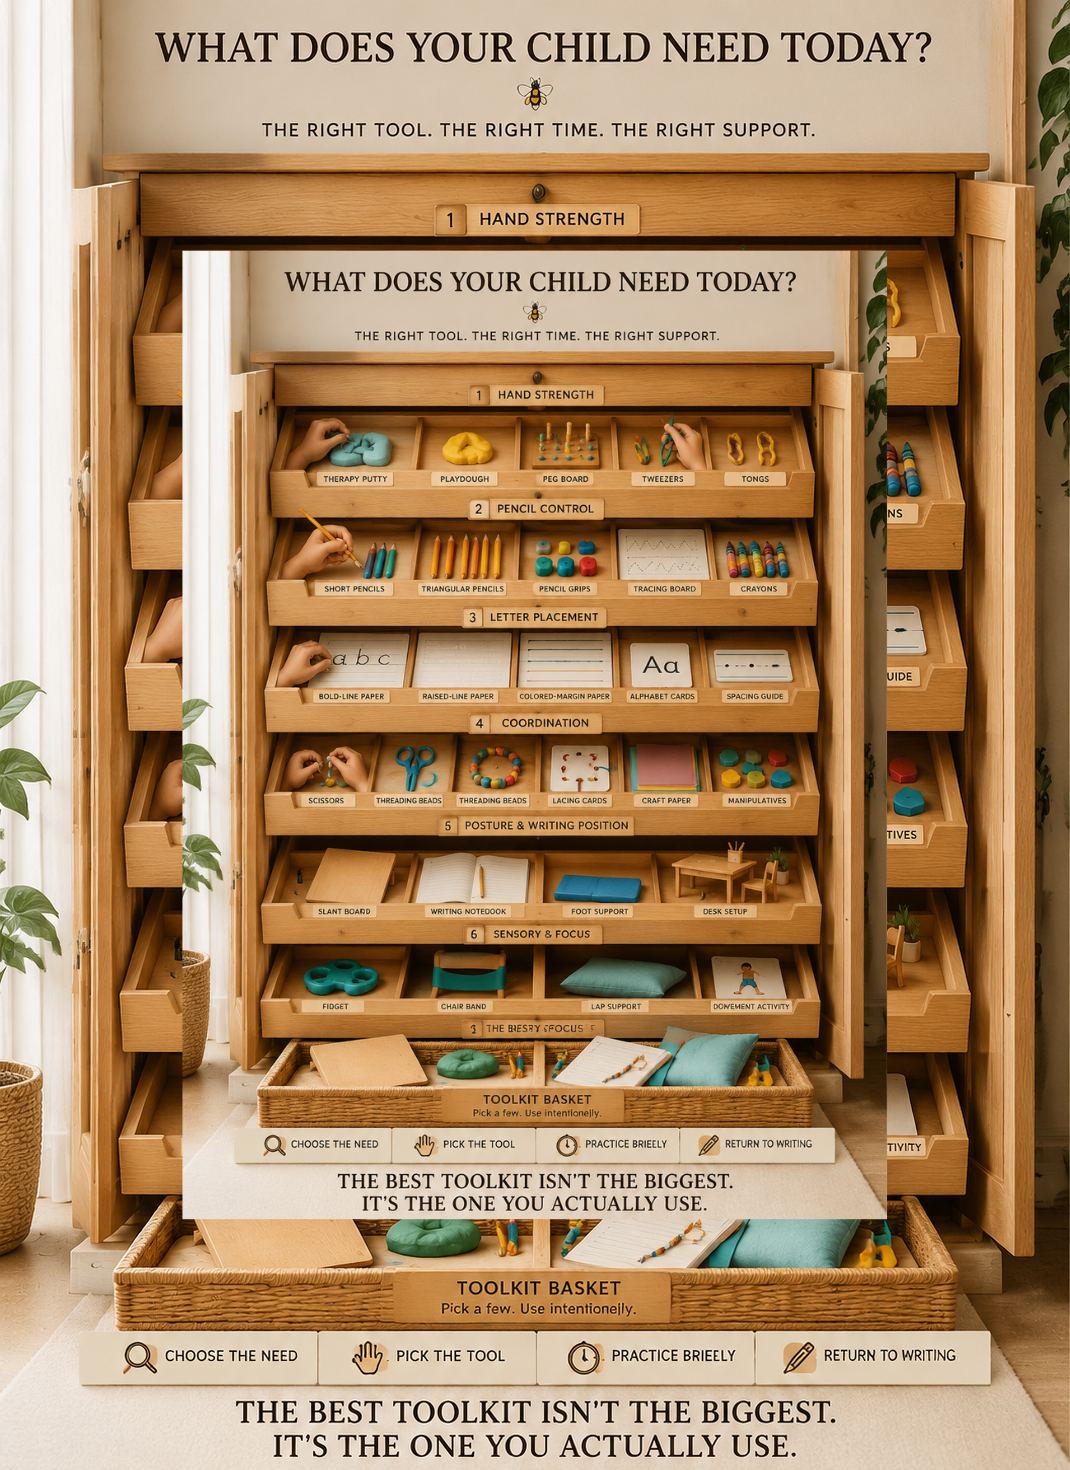
Toolkit at a Glance: Tool, Purpose, How to Use
This table summarises common toolkit items, what they help with, and simple ways to introduce them. You can adapt it to your setting and add or remove items based on what works for your children.
| Tool | Main purpose | How to use |
|---|---|---|
| Short pencils and simple pencil grips | Support a more mature grasp and reduce strain on the fingers, especially for younger children or those who squeeze tightly. | Use for most handwriting practice and longer tasks; show children exactly where fingers go and give time to get used to the new feel rather than swapping constantly. |
| Adapted paper (bold lines, coloured or raised lines) | Provide extra visual or tactile cues for letter size, placement, and spacing, especially helpful for children whose writing “floats” or squashes. | Use for key practice tasks (e.g., spelling, sentences) and gradually fade when children can maintain placement on plain paper. |
| Playdough or Theraputty | Build hand and finger strength and support graded force (not squeezing too hard or too soft). | Spend 2–3 minutes before writing squeezing, rolling, pinching, and hiding small objects in the dough, then move straight into handwriting while hands are “warm.” |
| Scissors and simple craft materials | Develop bilateral coordination, hand strength, and hand-eye coordination in a playful context. | Include short cutting tasks (lines, shapes, simple pictures) a few times a week; focus on safety, correct scissor hold, and enjoyment rather than perfection. |
| Peg boards and small manipulatives | Strengthen precision pinch, support patterning, and practise visual-motor coordination in a hands-on way. | Use for a few minutes in fine-motor centres or home routines; invite children to copy patterns, create their own, or follow simple “picture cards.” |
| Slant board or slightly tilted surface | Improve posture, wrist position, and visual access to the page, helpful for both print and cursive writing. | Use for children who hunch over the desk or lean very close to the page; combine with feet supported and table at roughly elbow height. |
| Simple sensory supports (fidget, chair band, lap weight) | Help some children regulate movement, alertness, or restlessness so they can focus better during writing. | Introduce one item at a time with clear rules (e.g., “in hands, not in the air”) and review regularly with the child and teacher or OT to see if it is helpful. |
Using Your Toolkit at Home and in the Classroom
A toolkit is most effective when it is part of everyday routines rather than only brought out for “special” sessions. At home, tools can live in a small basket or box so that fine-motor play and short writing tasks are easy to set up after school or during quiet time. In classrooms, keeping a few key items in a labelled container makes it easier for teachers and support staff to offer the right tool quickly without interrupting the whole group.
Where possible, coordinate with your child’s teacher or occupational therapist about which tools to use and how. For example, the same type of adapted paper or grip can be used at home and school, and simple checklists from earlier blogs (such as “Name, date, spaces, punctuation”) can be paired with these tools to support self-checking and independence.
Related Reading
Explore the rest of the series:
- Print, Cursive, or Typing: Choosing the Right Writing Style for Children
- Handwriting Success Stories: Fine Motor Progress with OT and Family Support
- Fine Motor and Handwriting FAQ: OT Progress and Parent Questions Answered
- Handwriting Progress Over Time: Fine Motor Development and OT Support
- Home Routines for Fine Motor and Handwriting: Daily Activities That Work
- Sensory-Friendly Classrooms and Handwriting: Classroom Supports for Fine Motor Skills
- Executive Function and Handwriting: Attention, Memory, and Fine Motor Skills
- Praxis and Motor Planning in Children: Development, Activities, and Milestones
- Proprioception and Pencil Pressure: Why Kids Write Too Hard or Too Light
- Bilateral Coordination in Children: Development, Activities, and Milestones
- Hand-Eye Coordination in Children: Visual-Motor Development by Age
- Hand Dominance in Children: When It Develops and Why You Shouldn't Choose
- Crossing the Midline in Children: Why It Matters for Writing and Coordination
- Tactile Sensitivity and Fine Motor Skills: Helping Kids Who Avoid or Crave Touch
- Sensory-Friendly Fine Motor Routine: Daily Activities That Help Kids Focus
- Vestibular Input and Fine Motor Skills: Helping Active Kids Focus Through Movement
- Sensory Seekers and Fine Motor Skills: Helping Kids Focus Through Movement
- Fine Motor Milestones Birth to Age 5: Complete Development Chart
Ready to stock your toolkit? Our Educational Peg Boards fit neatly into both home and classroom toolkits, offering child-led, pattern-based fine-motor practice that supports many of the skills discussed in this guide.
Shop Educational Peg Boards Visit Our Google Business ProfileMontessori Toys Team
We help families and teachers choose child-friendly tools that turn fine-motor and handwriting research into everyday practice.